MAKE YOUR OWN PCB WITH AN IRON AND A LASER PRINTER
INTRO
I wrote this as a little guide and checklist for myself, and I thought I would share it with the world. There are some other great guides here and here.
YOU WILL NEED
-A circuit design with blank spaces filled in
-Blank PCB (it's cheap if you get it from ebay)
-Dremel
-Dremel drill press
-Rubber gloves
-Glossy paper (I use Staples' "Picture Paper"--item No. 471861)
-Laser printer
-Latex gloves
-Drill bits. I use # 65 (y.0320) and 75 (y.0260) for vias. I also get these from ebay.
-Acid
-Acetone (nail polish remover)
-Scrub pad
-Plastic tray
-Iron
-Ironing surface
-Permanent marker
-Nail Polish (optional)
-Paper towels
TRANSFERRING THE DESIGN TO THE PCB
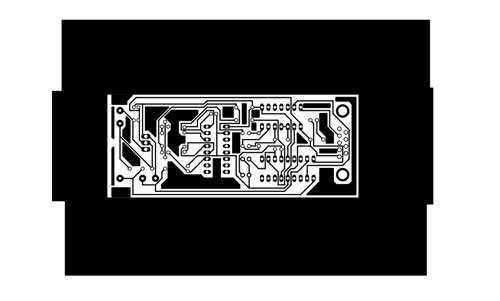
-Using a laser printer, print out your design onto the glossy paper. If necessary, remember to print out the reverse image.
if double sided- select several holes that are as far apart as possible from each other. Take your drill bit and manually drill through that hole. Do the same to the corresponding holes for the printout of the other side. These will be used for aligning the two sides.
-Trim the paper down. I usually cut it into a long, narrow strip the width of the pcb. This way, it is easy to align on the board, and because it is smaller, it is not unweildly.
-Clean your board with acetone. Clean it well.
-Turn your iron to its hottest setting.
-Line up your paper to the board.
-With the iron, put moderate pressure towards the interior of the board- this is to seal the paper in place so it won't shift.
-Iron the crap out of your pcb. If you press too hard you can cause the toner to spread out, but don't be afraid to lean into it. Iron for several minutes. There's nothing more annoying than having to start over because the toner didn't take to the copper.
If double sided: Let your pcb cool. Now use your dremel drill kit to drill holes through the pcb, using the holes you poked out of the paper.
If double sided: Now take your second side, and holding your pcb against the light, line up paper with the holes. [need picture]
If double sided: Place the board on your ironing surface and don't let the paper fall out of alignment. While keeping your hand on it to keep it aligned, iron enough of the surface to make it stay in place.
If double sided: Repeat previous ironing steps.
Soak the board in warm water for about 20 min.
Peel of the paper carefully.
Scrub the rest of the paper off with a toothbrush. Be gentle. If you are too aggressive you may scrub off the toner.
If a lot of toner has come off with the paper, you can start over by srubbing the board with your scrubbing pad and acetone.
If there are minor problems with the toner coming off, you can fix them with a permanent marker.
If fixing with a permanent marker: The marker is not a very good resist. A lot of ink has to transfer to the copper to resist the acid. I go over things several times, making sure the ink doesn't look too thin.
If you don't need the precision of the permanent marker, you can use nail polish. It's an excellent resist.
NOW YOU ARE READY TO ETCH
Beware: the acid will stain anything it touches, even your skin. Its also very poisonous. So...
Put some newspaper/paper towels down where you are going to etch.
Heat the acid. I just found a good way to do this. I have these stacking plastic trays. I fill the bottom one with hot water. I then put the top tray--the tray I'm going to put the acid in--in the bottom tray. The water in the bottom tray heats the acid and keeps it hot. It's ok if the top tray is floating a little--that makes it easier to agitate.
Pour the acid into the tray to a depth of about 1/4 inch. Put the tray pcb in.
Agitate.
Wearing the gloves, check your board periodically. The less copper there is to remove, the faster the etching will go.
When copper is removed, wash off the board and then scrub off the toner with acetone and your scrub pad.
Throw out your acid: Put it in the toilet. You put it in the toilet because if you pour it down the sink, it could sit in your gas trap and maybe eat the pipes. Putting it in the toilet dilutes it and sends it past the trap.
Drill the holes! I use the #65 (y.0320) drill bit for most of the holes, and 75 (y.0260) for vias (double sided only).
Coat the board in some kind of acrylic floor wax. This prevents oxidation later. I use a hardwood floor "refresher." I've also heard you can use "Bruce 1-step Acrylic."
Test the board for shorts and broken connections. Bridge broken connections using wire or, if they are small enough, solder. Fix shorts by scraping away copper.
NOW YOU ARE READY TO SOLDER YOUR COMPONENTS ONTO THE BOARD
Solder your components onto the board